
Home Tweet Home
Hi everyone, hope you are enjoying the new Website! It was lovely
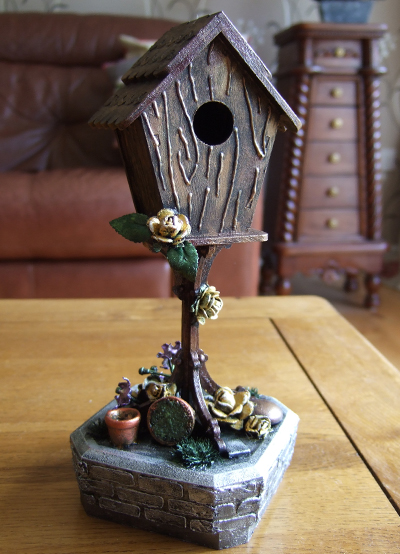
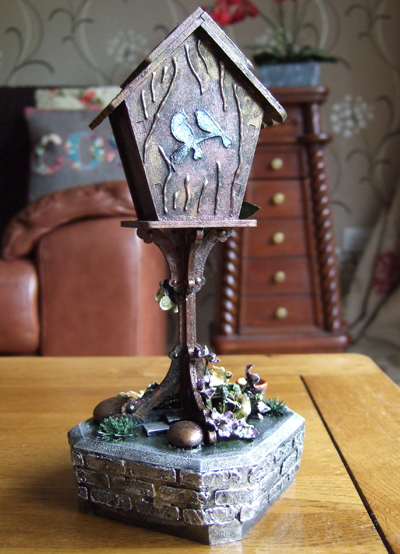
to meet lots of crafting friends old and new at the Great British Crafts Festival at Stoneleigh Park last weekend. One of our new featured products there was our Freestanding Birdbox.
The sample on display at the show was decorated with a very
simple but highly decorative technique. For this project you will need our 3D Birdhouse on a Stand, various embellishments of your choice and 111 cups of coffee!!!........
ok, no, this is not that stressful or difficult to do.... it is simply because, for the base, I used the lid of an old 200g Gold Blend Coffee Jar!
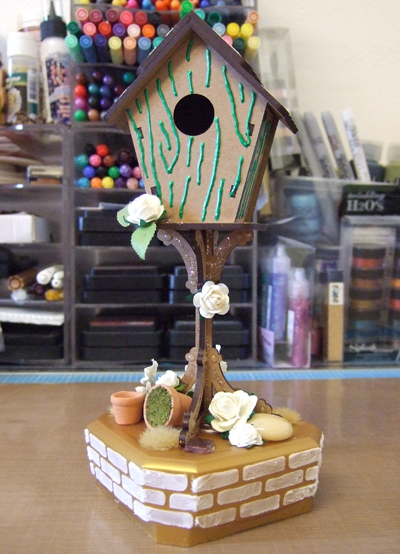
Firstly I assembled the Birdhouse, glueing together with pva glue. Next I decorated the Birdhouse using 3 of our new Stencils
Wood Grain
Scallop Tile
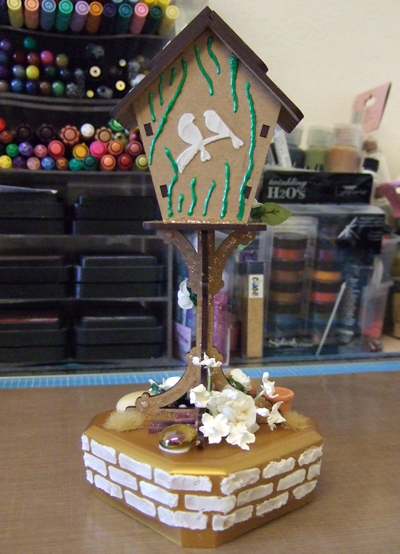
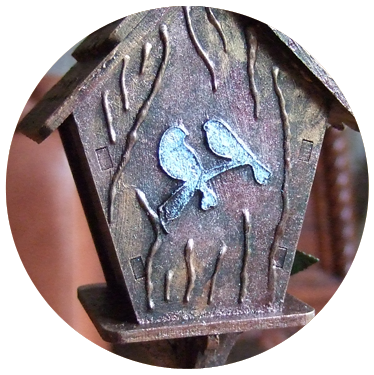
Love Birds
Because of the shape of the House I found it easier to cut the
Scallop Tile Stencil smaller, basically just cut either side 6 lines down. This then creates 2 Stencils! which is perfect for
decorating the Roofs of our 3D Birdhouse on a Stand, 3D Birdhouse, and our 3D Wishing Well. Finally I drew with Pinflair Craft Wand Glitter randomly all over the Stand to add texture. The more texture you can add to a piece the better the finished result will be.
The Wood Grain Stencil I used to draw pencil lines through as a guide, and then drew lines with liquid pearls over the pencil lines (shown in green). Finally using a thick texture Paste, (I used
Decoarts Paintable Texture Paste), I stenciled the Two Birds using our Love Birds Stencil on the back of the Birdhouse.
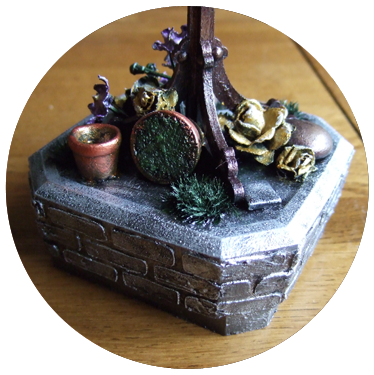
Next I prepared the base. Decorating the side of the base, using another of our new Stencils, the Stone Wall Stencil I applied Texture Paste to each side of the Coffee Jar Lid. Working round the base allowing each side to dry, before doing the next. Once everything was dry I stuck the Birdhouse onto the base using glue suitable for sticking anything... I find a glue called Crafters Pick "The Ultimate!", excellent for this.... it sticks anything...... wood, metal, plastic, glass..... etc etc! perfectly.
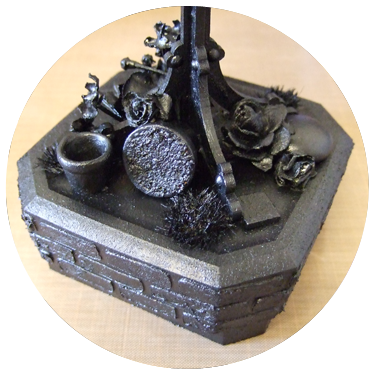
Now you can start adding whatever pieces you like to create a little scene. On the sample I used Paper & Silk Flowers, Dolls House/Model Makers Grass Tufts, Dolls House Flower Pots, Glass Pebbles, Mosaic Tiles. It does not matter what colour the pieces are and is a great way to use up odd crafty bits from your stash! or even found objects such as small pebbles, seed heads etc....
Next the fun part, this is great, if you are a bit of a neat freak like me, for just letting go and getting your hands dirty...
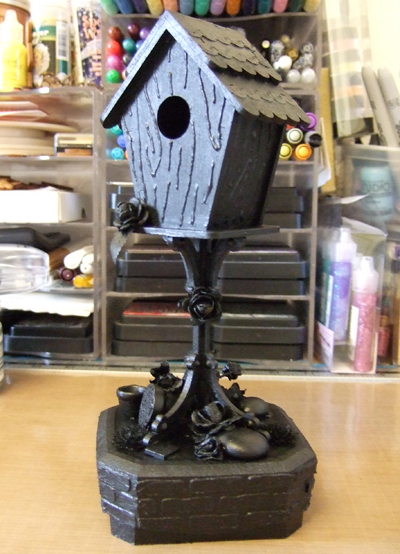
Paint absoloutely everything with Back Artists Acrylic Paint. Take it slowly and just enjoy the process, taking time to get paint in all the nooks and crannies!! I usually apply 2 coats allowing to dry before applying a second coat. (TOP TIP: sometimes, especially with flowers for example, it is easier to paint some of the items black before sticking down)
Allow to dry thoroughly, I usually leave overnight then let the colour begin! Using Pinflair Liquid Buff-It and Pinflair Buff-It start adding colour. Use a paint brush to add the Liquid Buff-It dabbing it into the spaces, tufts, flowers etc. The Buff-It is best applied using your finger tips gently rubbing the paste on, highlights the raised areas, add as much or little as you like, until you are happy with the finished look, and if you are not.... you can simply re-paint any area with the Black Acrylic and start again!
I hope you enjoyed this process & project, and I would love to see any of your finished Birdhouses decorated in this, or any other technique.
(based on a technique demonstrated at an exhibition by Lindsay Mason)
Don't forget if you would like to receive updates on new products, features, latest blog posts etc, to subscribe to our newsletter.